

How it works
Tasks are stored in your PayPlaxe account
They are tied to your Clover merchant id, so the same list opens on every Clover device in the store and in the browser. There is no offline copy, so the app needs an internet connection.
Categories keep the list short
Create your own in Manage categories. The side menu switches between them.
Alarms do the reminding
A task with an alarm raises an Android notification on the Clover device. Tapping it opens the task. Alarms are re-armed when the app opens, when an employee logs in and after the device restarts.
Finished tasks move aside
Ticking a task moves it to Completed, so the active list stays readable.
What it does
Fast task creation
Tap +, type a title, save. Description, alarm and employee are optional.
Categories
Group tasks by area. You create the categories in Manage categories. Every category has a colour, and that colour is the strip down the left edge of its tasks.
Completed list
Finished tasks go to Completed, reachable from the side menu.
Alarms and notifications
Set an alarm on a task. At that time the Clover device raises a notification, and tapping it opens the task. The Done button on the notification ticks the task off and moves it to Completed.
Assign an employee
Attach a task to the person who has to do it, so shift handovers are clear.
Charge an amount
A task can carry an amount. A short tap on the amount chip opens the dialog that changes it. A long press creates a Clover order with one line named after the task and opens Clover Pay. That is a real payment, so do not long-press the amount just to read it.
Same list on every device
The list is shared across every Clover device in the store, and the browser version shows the same tasks.
Web version
taskmanager.payplaxe.com opens the same list in a browser: Tasks, Categories and Settings. Sign in with Login via Clover, your Clover account, no password. Notifications and the payment for an amount happen on the Clover device only. It is the same app, not a separate product: the browser is where it is set up, with the same Clover account and nothing extra to buy.
Price & installation
How to install
- Open the Clover App Market — on the device, or at clover.com/appmarket in your web dashboard.
- Find the app by name, or open its direct link from the button above.
- Tap Connect / Install and accept the permissions the app requests.
- The 30-day free trial starts automatically. The subscription then appears on your monthly Clover invoice.
- Open the app on the Clover device and sign in with a Manager or Admin employee account to configure it.
- To cancel later, uninstall the app from the App Market — the steps are right below.
How to cancel the subscription
Cancelling means uninstalling the app — there is no separate billing screen.
- Open the App Market — on the Clover device, or in the web dashboard.
- Open My Apps. Every app you pay for is listed there with its monthly fee.
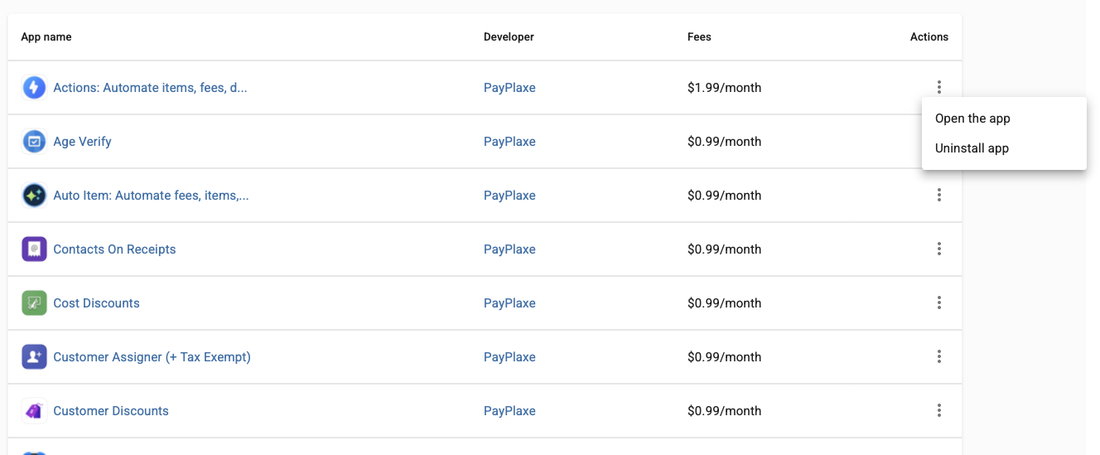
- Tap the ⋮ button on the app's row and choose Uninstall app.
- The app's own page works too: ⋮ next to the green Open the app button → Uninstall app.
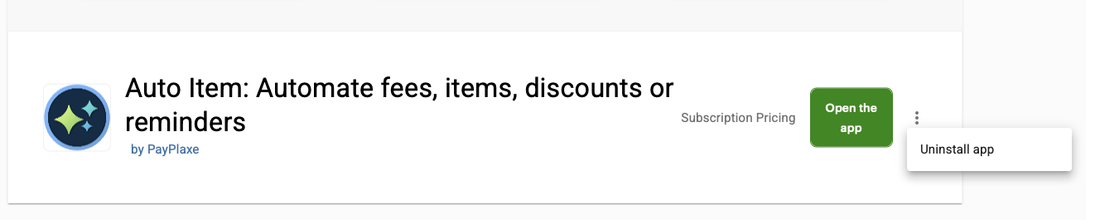
- Confirm. The subscription stops there and then — the app is off your next Clover invoice.
Install and cancel any time from the Clover App Market.
First setup
Do this once, in this order. It takes a few minutes and the app is then ready for the shift.
- Open Task Manager; it starts on All Tasks.
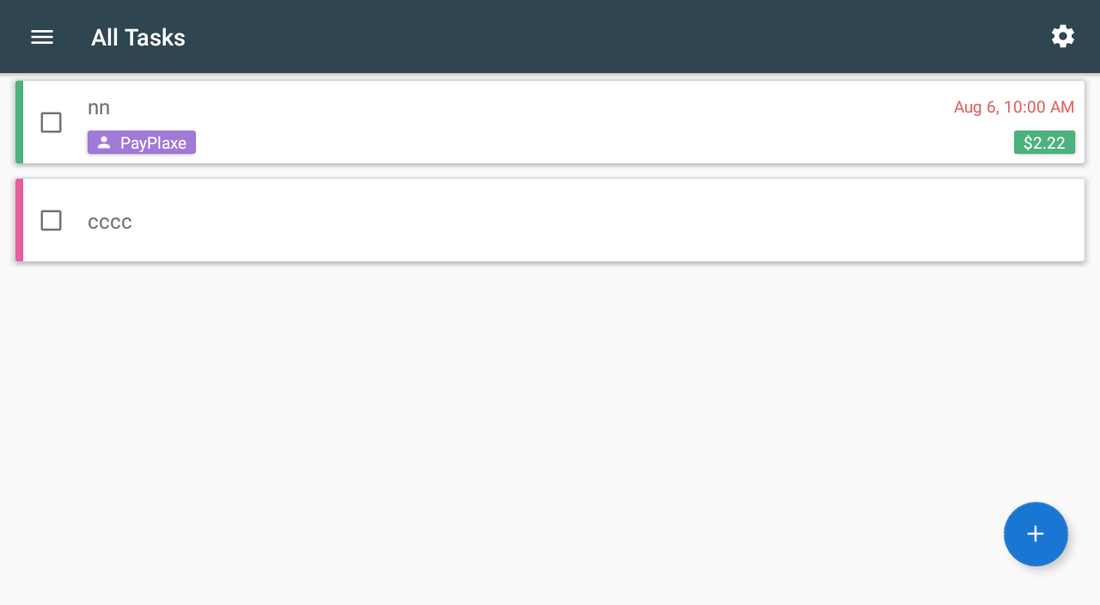
- Open the side menu (☰) → Manage categories and create the categories your store needs.
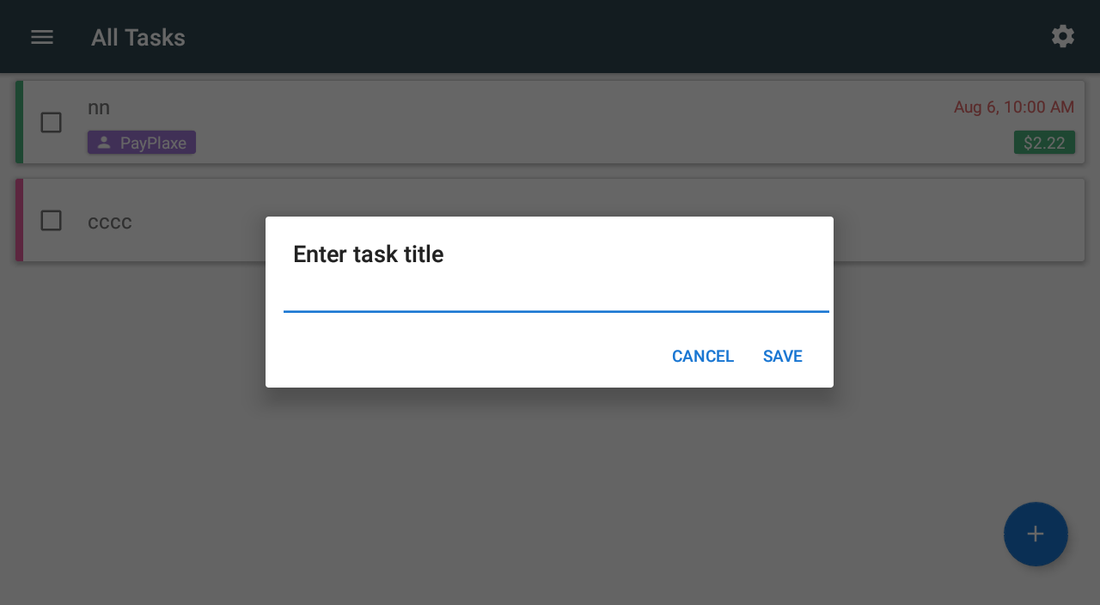
- Tap +, type a task title and save — that is enough to create a task.
- Open the task to add a description, an alarm and the employee responsible, then tap Save — changes are only kept once you save.
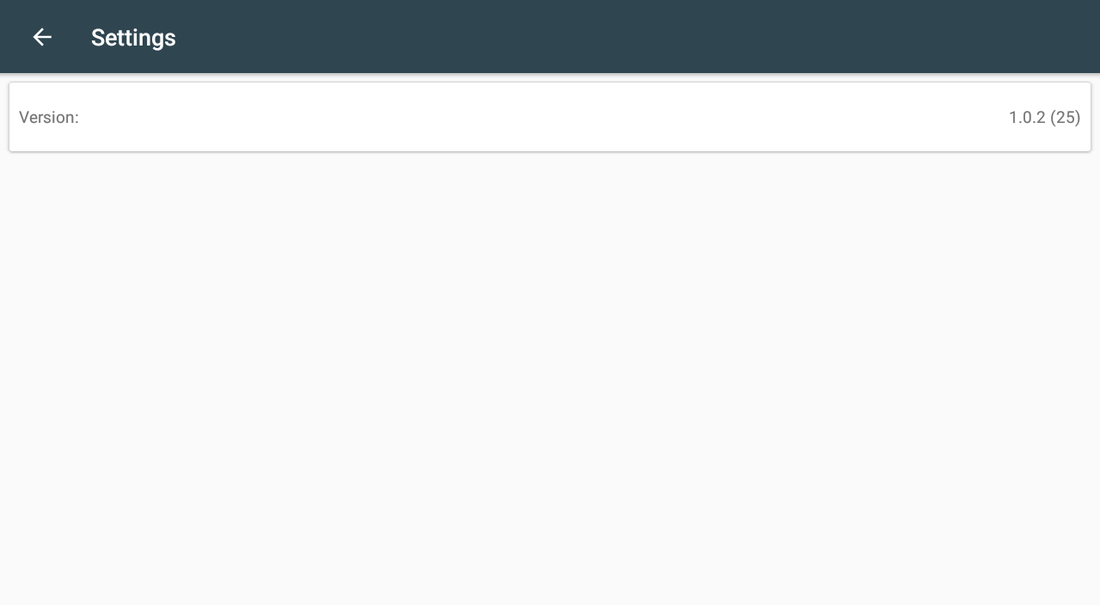
- Check Settings if you need the app version for support. In the EU the screen also carries a Do not track me switch, which turns off anonymous crash reporting.
Setup scenarios
Each scenario is a complete configuration — follow the steps in order.
1Opening and closing checklist
The same steps every day — and they should not depend on who is on shift.
- Open the side menu → Manage categories and create Opening and Closing.
- Switch to the Opening category and add the tasks one by one with +.
- Open any task that needs detail and fill the Add a description field.
- Add an alarm on the time-critical ones, e.g. the cash count.
- During the shift the team ticks tasks off; they move to Completed.
2Assign work to a specific employee
So a job has an owner instead of being everybody's problem.
- Create the task and open it.
- Pick the employee in the task details — the name appears on the task card in the list.
- Add an amount if the task involves money (a supplier payment, a deposit to bank).
- Set an alarm for the deadline.
- Tap Save — the employee, the amount and the alarm are stored only when you save.
- When the notification fires, the employee taps it to open the task, then ticks the task off in All Tasks.
3Supplier and warehouse follow-ups
Orders to place, deliveries to chase, stock to count — separate from daily floor work.
- Create Suppliers and Warehouse categories in Manage categories.
- Create a task per supplier with the description holding the contact details and what to order.
- Set the alarm for the day you normally place the order.
- Check All Tasks at the start of the shift to see what is due across every category.
- Review Completed at the end of the week to confirm nothing was skipped.
Reference
Screens and settings
Every screen of the app and what each setting does. (4)
Screens and settings
Every screen of the app and what each setting does. (4)
All Tasks
| Setting | What it does |
|---|---|
| Checkbox | Completes the task and moves it to Completed. |
| Task row | Title, the assigned employee, an optional amount and the alarm time. |
| Colour strip | The colour of the task's category, down the left edge of the card. A task with no category has no strip. |
| ☰ menu | All Tasks · Completed · Manage categories. |
| Gear | Opens Settings. |
| + button | Creates a task. It is hidden while Completed is open. |
New task
| Setting | What it does |
|---|---|
| Enter task title | The only required field. |
| SAVE / CANCEL | Creates the task or discards it. |
| Description | Added later from the task details. |
| Alarm | Set in the task details; raises a notification. |
Edit task
Opens when you tap a task. Nothing is saved until you tap Save.
| Setting | What it does |
|---|---|
| Title | The task title, at the top of the screen. Type over it to change it. |
| Category chips | One chip per category; tap one to move the task. With no categories yet, No category is shown. |
| Add a description | Free text under the title. |
| Add an alarm | Opens a date picker, then a time picker. Once set, the chip shows the time and its ✕ clears the alarm. |
| No employee | Opens Select employee with your Clover employees. Tapping the chip again clears the employee. |
| No amount | Opens Enter amount with Ok, Clear and Cancel. A long press on the chip charges the amount through Clover Pay. |
| Save | Stores the changes. Leaving the screen without it discards them. |
Manage categories
Side menu → Manage categories. Categories can be created and removed, not renamed and not recoloured.
| Setting | What it does |
|---|---|
| Category card | One card per category, two per row, with a circle in the category colour. |
| ⋮ → Remove | Removes the category after a confirmation. Its tasks stay in All Tasks. |
| + button | Opens the new category screen. |
| Category name | The name of the new category. It cannot be changed later. |
| Colour row | Seven colours: blue, green, purple, pink, red, orange, yellow. The colour is the strip on the task card. |
| ADD | Creates the category. |
Screenshots taken from the running app on a Clover device. The apps’ interface language is English. Click a screenshot to enlarge.
Everyday use
What the cashier does after the app is configured.
- At the start of the shift open All Tasks and read what is due.
- Tick tasks as they are finished — they move to the Completed list.
- When a notification appears, tap it to open the task, then tick the task off in the list.
- At the end of the week review Completed.
Troubleshooting
Symptom on the left, what to do on the right.
| Symptom | What to do |
|---|---|
| A task disappeared. | It was completed — open Completed in the side menu. If it is not there, it was deleted: a long press on a task card offers Remove, which deletes the task for good on every device. |
| All tasks of a category are gone. | They are not gone. Deleting a category deletes the category only: open All Tasks and the tasks are still listed, without their colour strip. Only the category itself has gone from the side menu. |
| No notification appears. | The task has no alarm, or notifications are blocked for the app in Android settings. After a restart the device re-arms its alarms by itself. If an alarm still does not ring, open Task Manager once. An alarm whose time passed while the device was off does not fire later. |
| The alarm or employee I set did not stick. | The task detail screen keeps changes only after you tap Save. Leaving the screen without saving discards them. |
| The app says "Your Clover token is invalid", or the list is empty. | Every task is read from the PayPlaxe server, so the Clover device has to be online. Check the internet connection and tap Retry. |
| The app's dialog never appears on the payment screen; Clover shows "Customer is choosing payment method". | Open the Clover Setup app → Payments and uncheck Automatically take payment on Connected Device, so payment is taken on the primary device. |
| Settings cannot be opened or changed. | Sign in with an employee whose Clover role is Manager or Admin. Some apps also have their own Restrict access switch that locks the configuration. |
| The app works erratically, or stops reacting after the device has been idle. | Turn off Battery Saver in the device's Android settings and keep the device online. |
| A change made on one device is not visible on another. | Settings sync through the cloud; give it a minute and make sure both devices have a network connection. |