

How it works
It sits on top of the app you are using
The bubble is drawn over the Register, the inventory or any other screen. On Clover the permission that allows this comes with the installation — there is nothing to switch on.
The app underneath keeps running
Opening the calculator does not close or reset the order.
One tap to open, one to close
Tap the bubble for the keypad. Tap outside the card, tap the bubble again, or press the device Back key to close it.
Four pages on one card
Settings, History, Keypad and the scientific pad sit side by side. The card always opens on the keypad; swipe right for history, right again for settings, and left for the scientific keys.
You decide how visible it is
The opacity and the resting position of the bubble are yours to set. The open keypad always sits in the top-right corner.
What it does
Floats over any app
The bubble stays on top of the Register, Inventory and Orders. No app switching, no lost order.
History
The last ten calculations are kept while the calculator is running. Tap an entry to add its result to what is already on the display. The list is emptied when the calculator is closed or the device restarts.
Scientific functions
sin, cos, tan, ln, log, %, square root, cube root, power, factorial, parentheses, π, e and a key that wraps the whole expression in brackets. A long-press on sin, cos or tan gives asin, acos or atan. Trigonometry works in radians only — there is no degree switch. The i key is for complex numbers and has no use at the counter.
Choose the bubble colour
Pick from twenty-one accent colours so the bubble matches your counter setup.
Opacity
Floating opacity fades the bubble from full down to 20%. It applies at all times, not only when the bubble is idle, and the bubble never disappears completely.
Send the amount to payment
Press = first, then long-press the result: the Clover payment screen opens for that amount as a manual payment. A long-press sends the right figure only when the display holds one plain number. On an unfinished expression the digits are run together, so 12+5 starts a payment for $125.00, and a minus sign is dropped. When the display holds no number — Error, a symbol, or a figure that is too long — the long-press copies the display instead and shows Text copied.
Price & installation
How to install
- Open the Clover App Market — on the device, or at clover.com/appmarket in your web dashboard.
- Find the app by name, or open its direct link from the button above.
- Tap Connect / Install and accept the permissions the app requests.
- The 30-day free trial starts automatically. The subscription then appears on your monthly Clover invoice.
- Open the app on the Clover device and sign in with a Manager or Admin employee account to configure it.
- To cancel later, uninstall the app from the App Market — the steps are right below.
How to cancel the subscription
Cancelling means uninstalling the app — there is no separate billing screen.
- Open the App Market — on the Clover device, or in the web dashboard.
- Open My Apps. Every app you pay for is listed there with its monthly fee.
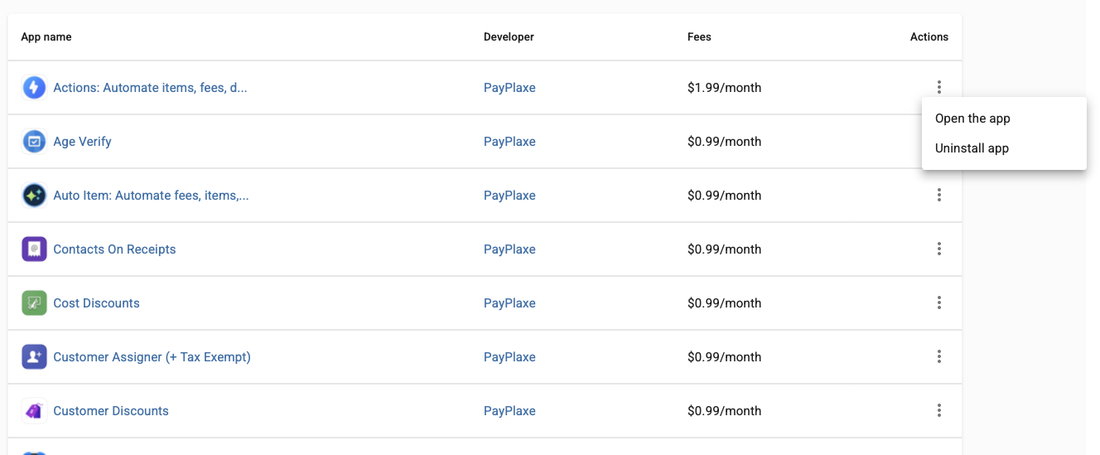
- Tap the ⋮ button on the app's row and choose Uninstall app.
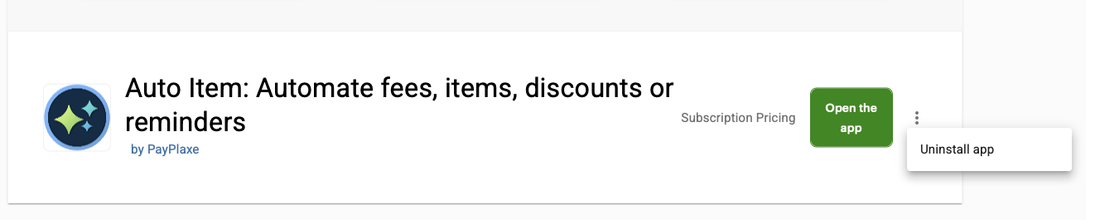
- The app's own page works too: ⋮ next to the green Open the app button → Uninstall app.
- Confirm. The subscription stops there and then — the app is off your next Clover invoice.
Install and cancel any time from the Clover App Market.
First setup
Do this once, in this order. It takes a few minutes and the app is then ready for the shift.
- Install the app from the Clover App Market.
- Open it once — the green bubble appears in the top-left corner of the screen, tucked slightly under the edge.
- Drag the bubble to a resting spot that covers nothing important.
- Tap it to open the keypad — it always opens in the top-right corner, over whatever app is on screen.
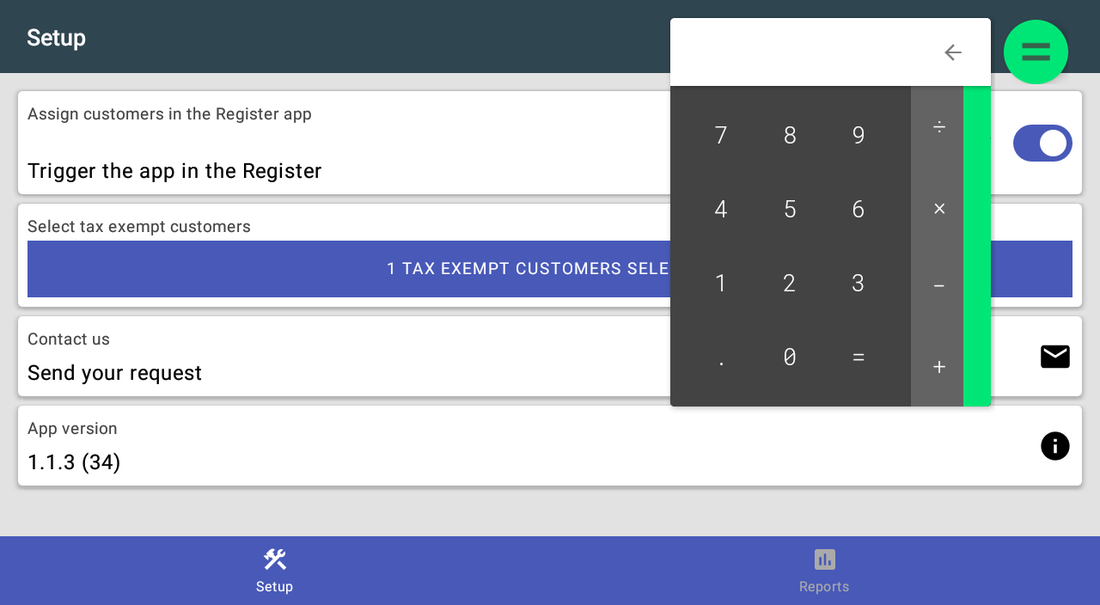
- Swipe the pad right twice — past the history page — to the settings, then lower Floating opacity or pick a different bubble colour.
Setup scenarios
Each scenario is a complete configuration — follow the steps in order.
1It works as soon as it is installed
No setup, no permissions to hunt for: on Clover the app can draw over other screens from the start.
- Install Widget Calculator from the Clover App Market.
- Open it once — the green bubble appears in the top-left corner, tucked slightly under the edge of the screen.
- Tap the bubble to open the keypad; tap outside it, tap the bubble again, or press the Back key to close it.
- Drag the bubble to a resting spot that covers nothing — dragging moves the resting bubble only, the keypad always opens at the top right.
- Swipe the pad right twice, past the history page, to reach the settings if you want it more discreet.
2Everyday counter maths
Splitting a bill, checking change, converting a case price to a unit price — while the order is still open.
- Leave the Register order on screen and tap the calculator bubble.
- Type the calculation; use parentheses for anything longer than one step.
- Press = and read the result. Long-press it only when you mean to start a Clover payment for that amount: on an unfinished expression the digits are run together, so 12+5 charges $125.00.
- Close the calculator — the order is untouched.
- Swipe right to the history page to re-check one of the last ten figures; write down anything you need to keep, because the list is lost when the calculator is closed.
3Make the bubble less intrusive
On a customer-facing screen the bubble should not distract.
- Tap the bubble, then swipe the pad right twice to the settings page.
- Lower Floating opacity — the bubble fades to 20%, at all times, but never disappears.
- Park the bubble at an edge no app uses for buttons; this moves the resting bubble, not the keypad, which always opens at the top right.
- Pick a bubble colour that blends into the screen behind it.
- Check the layout on the customer-facing display before the shift starts.
Reference
Screens and settings
Every screen of the app and what each setting does. (1)
Screens and settings
Every screen of the app and what each setting does. (1)
Floating calculator
| Setting | What it does |
|---|---|
| Green bubble | Tap to open and close the calculator. Drag it to move — it snaps to the left or right edge, and this moves the resting bubble only. Do not drop it on the ✕ at the bottom of the screen: that closes the app. |
| Keypad | Digits, + − × ÷ and =, drawn over the app underneath. It always opens in the top-right corner and cannot be moved. |
| Display | Press = before you long-press it. A long-press starts a Clover manual payment for the number shown; on an unfinished expression the digits are run together, so 12+5 charges $125.00 and a minus sign is dropped. When the display holds no number, the long-press copies it instead and shows Text copied. |
| Backspace arrow | Top right of the keypad. A tap deletes the last character, or clears the whole display when a result is showing; a long-press clears it. It does not close the keypad — tap outside the card, tap the bubble again, or press the device Back key. |
| History page | One swipe right from the keypad. The last ten calculations, kept only while the calculator runs. Tapping an entry adds its result to what is already on the display. |
| Settings page | Two swipes right from the keypad. Holds Floating opacity and the colour swatches. |
| Scientific page | One swipe left from the keypad. sin, cos, tan, i, ln, log, π, e, %, !, √, ∛, ^, ( , ) and a key that wraps the expression in brackets. A long-press on sin, cos or tan gives asin, acos or atan. Angles are radians. |
| Floating opacity | How visible the bubble is, from 20% to full, at all times. It never becomes invisible. |
| Colour swatches | Twenty-one accent colours for the bubble and the scientific keypad background. |
Screenshots taken from the running app on a Clover device. The apps’ interface language is English. Click a screenshot to enlarge.
Everyday use
What the cashier does after the app is configured.
- Leave the Register order open and tap the bubble whenever you need a number.
- Press = first, then long-press the result to send it to the Clover payment screen as a manual payment — do this only when you actually intend to take that payment. A long-press on an unfinished 12+5 starts a payment for $125.00.
- The keypad always opens at the top right and cannot be moved: close it if it covers a button, and drag the resting bubble aside if that is what is in the way.
Troubleshooting
Symptom on the left, what to do on the right.
| Symptom | What to do |
|---|---|
| The bubble does not appear. | Open the app once — that is what starts it. While it is running you can also tap its Tap to open notification to bring up the keypad. In the rare case that the overlay permission is missing, the app opens Android's permission screen; allow draw over other apps there. |
| The bubble vanished after a reboot. | Open the app once to bring it back. |
| The keypad covers something important. | The keypad always opens in the top-right corner and cannot be moved. Close it — tap outside the card, tap the bubble again, or press the device Back key. Dragging moves only the resting bubble; lower Floating opacity to make that less noticeable. |
| The bubble is gone and there was no reboot. | The bubble was probably dropped on the ✕ target at the bottom of the screen, which closes the app. Open Widget Calculator again to bring it back. |
| The app's dialog never appears on the payment screen; Clover shows "Customer is choosing payment method". | Open the Clover Setup app → Payments and uncheck Automatically take payment on Connected Device, so payment is taken on the primary device. |
| Settings cannot be opened or changed. | Sign in with an employee whose Clover role is Manager or Admin. Some apps also have their own Restrict access switch that locks the configuration. |
| The app works erratically, or stops reacting after the device has been idle. | Turn off Battery Saver in the device's Android settings and keep the device online. |
| A change made on one device is not visible on another. | Settings sync through the cloud; give it a minute and make sure both devices have a network connection. |