

How it works
The discount belongs to a person
It is linked to customer records in Clover, so it follows the customer between visits.
The customer has to be on the order
Nothing happens until a customer is assigned. The app can open the selection dialog by itself, when the first item is added to the order and once per order.
You choose what it covers
Entire Order, Selected Items or Selected Categories. A staff discount can cover food but not gift cards.
Roles decide who may edit
Everyone, Managers and Admins, or Admins only. The same setting decides who can open Archives and the Settings tab.
Where the data lives
The customer records stay in Clover. The discount rules and the Clover IDs of the customers you tick are stored on PayPlaxe's servers, which is what lets the browser version show the same rules. Tell customers what you store and why, and keep the list to what you actually need.
It writes the Clover order note
When the app assigns a customer it replaces the order note with that customer's name, and it clears the note on any order that has no customer. Order notes print on receipts and kitchen tickets, so do not use them for anything else on these orders.
The same screens in a browser
The web version keeps the rules on a computer. Attaching the customer to an order and applying the discount happen on the Clover POS only.
What it does
Selected or any customer
Apply to Selected customers from the Clover customer list, or to Any assigned customer.
Entire order, items or categories
The discount can hit the whole order, a set of items or entire categories: Entire Order, Selected Items or Selected Categories.
Amount or percentage
A flat sum off or a percentage off.
Dates, hours or endless
Run it between two dates, each with a From and To time of day, or leave it running with Endless. Endless ignores the hours.
Customer selection prompt
The app can open the customer selection dialog when the first item is added to the order. It asks once per order.
Role-based editing
Everyone, Managers & Admins or Admins only. The same role also opens Archives and Settings.
Customer filters
When picking customers, filter by Selected only or Non-selected only to work through a long address book.
Archive
Retire a promotion without losing it.
The same screens in a browser
customerdiscounts.payplaxe.com opens Discounts, Archives and Settings with your Clover account. It is not a separate product: this is the setup side of the app you already have, with nothing extra to buy. Everything that happens at the register stays on the Clover POS.
Import customers from a spreadsheet
In the browser version only, Select customers has an Import button: an .xlsx with a column of Clover customer IDs ticks those customers for the rule. It selects customers you already have, it never creates them. The app labels it BETA.
Price & installation
How to install
- Open the Clover App Market — on the device, or at clover.com/appmarket in your web dashboard.
- Find the app by name, or open its direct link from the button above.
- Tap Connect / Install and accept the permissions the app requests.
- The 30-day free trial starts automatically. The subscription then appears on your monthly Clover invoice.
- Open the app on the Clover device and sign in with a Manager or Admin employee account to configure it.
- To cancel later, uninstall the app from the App Market — the steps are right below.
How to cancel the subscription
Cancelling means uninstalling the app — there is no separate billing screen.
- Open the App Market — on the Clover device, or in the web dashboard.
- Open My Apps. Every app you pay for is listed there with its monthly fee.
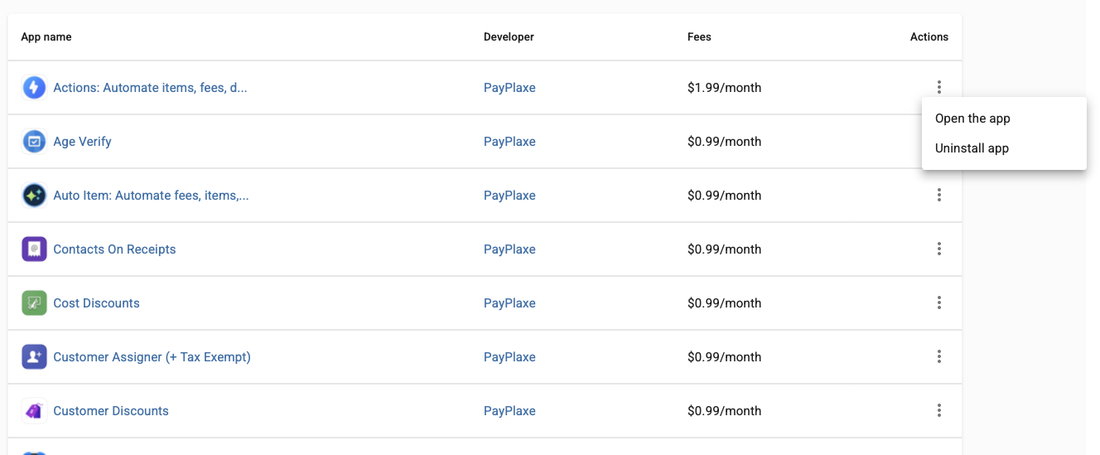
- Tap the ⋮ button on the app's row and choose Uninstall app.
- The app's own page works too: ⋮ next to the green Open the app button → Uninstall app.
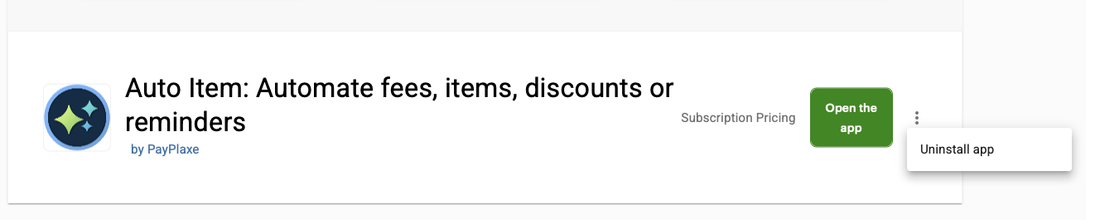
- Confirm. The subscription stops there and then — the app is off your next Clover invoice.
Install and cancel any time from the Clover App Market.
First setup
Do this once, in this order. It takes a few minutes and the app is then ready for the shift.
- Add the people to the Clover Customers app first — the app reads that list.
- Open Customer Discounts; the Discounts tab lists existing rules.
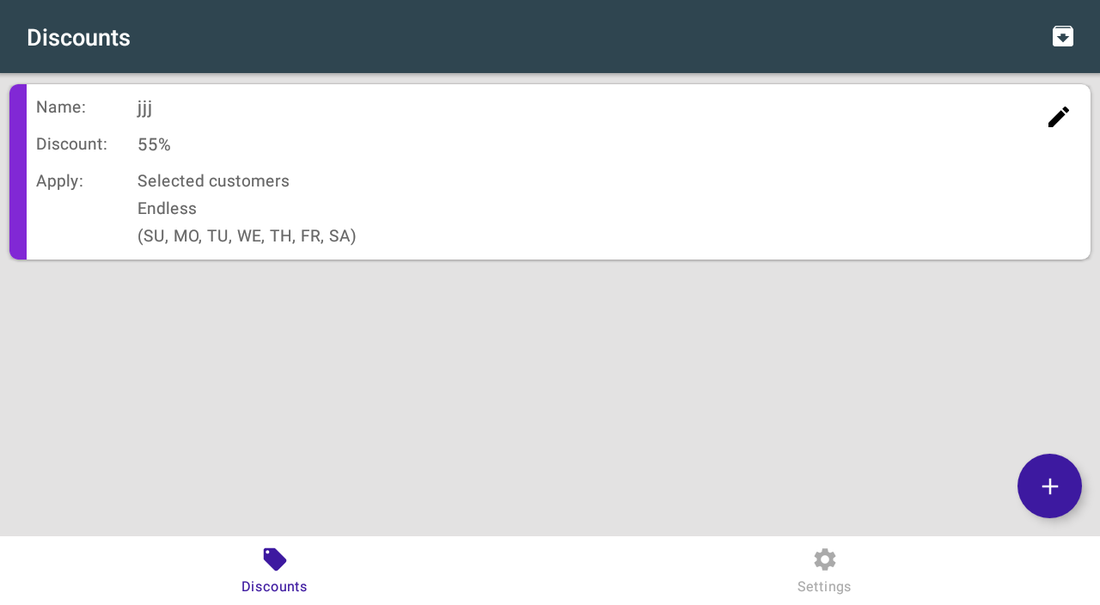
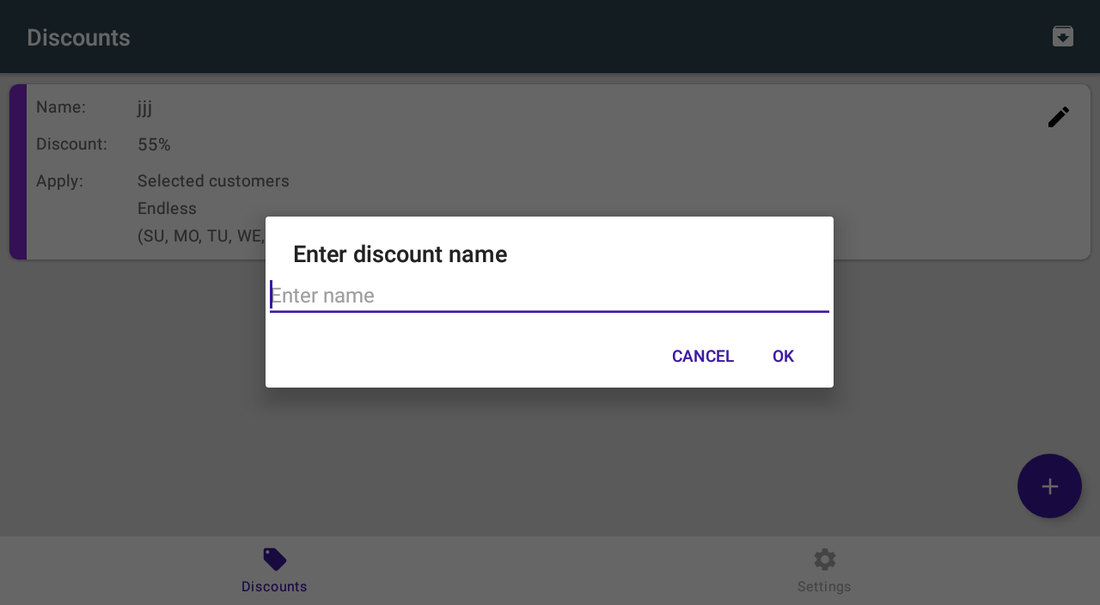
- Tap + and name the discount.
- Choose the type (Amount / Percentage) and, under Apply discounts on.., pick Entire Order, Selected Items or Selected Categories.
- Choose Selected customers and tick the people, or Any assigned customer for everyone identified.
- Set Specified dates — start and end dates, each with a From and To time — or Endless, tick the weekdays and save.
- Open Settings, turn on the customer selection dialog and set who may edit discounts.
Setup scenarios
Each scenario is a complete configuration — follow the steps in order.
110% for regulars, always
The regulars list is in Clover already; the discount should follow the person.
- Make sure the customers exist in Clover Customers.
- Open Customer Discounts → Discounts and tap +.
- Name it Regulars and choose Percentage with value 10.
- Under Apply discounts on.. choose Entire Order so it applies to the whole ticket.
- Choose Selected customers and tick the people it applies to.
- Set the timeframe to Endless and save.
- In Settings turn on the customer selection dialog so the cashier picks the customer as soon as the first item is rung up.
2Staff discount on food categories only
Employees get a discount on meals, not on cigarettes or gift cards.
- Create a discount named Staff.
- Under Apply discounts on.. choose Selected Categories and select the food categories.
- Choose Amount or Percentage as your policy requires.
- Pick the employees' customer records under Selected customers.
- Set Endless and save.
- In Settings set Who can edit discounts? to Admins only.
3A limited-time offer for identified customers
A campaign for anyone who signs up, running for two weeks.
- Create a discount and choose Any assigned customer.
- Under Apply discounts on.. choose Selected Items and pick the promoted products.
- Choose Specified dates and enter the campaign start and end, with the From and To times of day.
- Tick the weekdays the offer runs on.
- Save; when the campaign ends, open the rule's pencil menu and choose Archive to keep it for reuse.
Reference
Screens and settings
Every screen of the app and what each setting does. (4)
Screens and settings
Every screen of the app and what each setting does. (4)
Discounts list
| Setting | What it does |
|---|---|
| Name / Discount | The rule name and its value. |
| Colour stripe | The colour you gave the rule in the editor, down the left of the card. |
| Apply | Who it applies to and the schedule: the dates with their From – To times, or Endless. |
| Weekday chips | SU to SA; the green ones are the days the rule runs on. |
| Status dot | Active now, Starts in …, Ended, Disabled or No days selected. An Endless rule ignores the hours, so it can still apply while this line reads Starts in …. |
| Pencil | Opens a menu for that rule: Edit, Archive and Delete. |
| Archive icon (top right) | Opens the archived rules. |
| + button | Creates a new discount. |
Settings
| Setting | What it does |
|---|---|
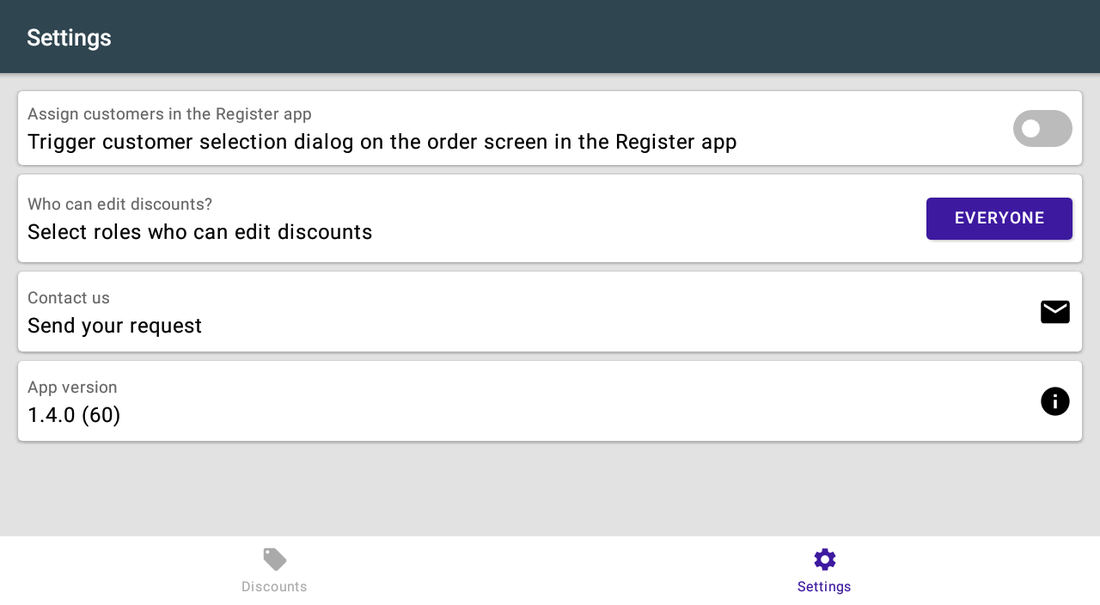
| Assign customers in the Register app | Opens the customer selection dialog on the order screen when the first item is added, once per order. |
| Who can edit discounts? | Everyone, Managers & Admins or Admins only. The role you pick covers creating, editing, archiving and deleting rules, and it also gates Archives and this Settings tab. |
| Contact us | Support request from inside the app. |
| App version | The installed version. |
Archives
| Setting | What it does |
|---|---|
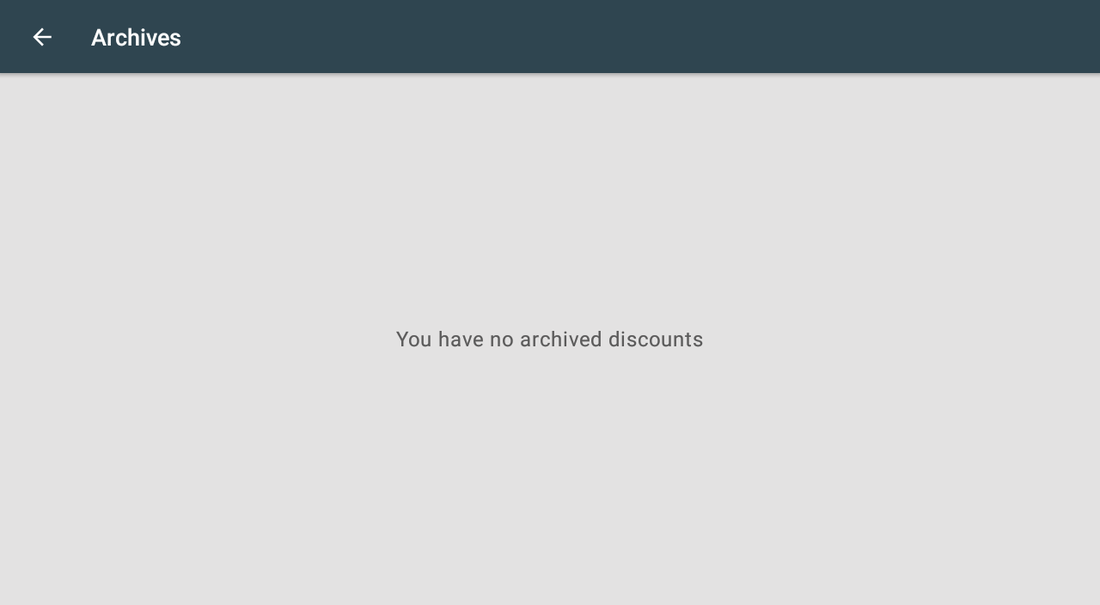
| Archived rules | Kept with their settings; tap the rule or the restore icon to bring it back. |
| Deleting | There is no delete on this screen. Delete a rule from the Discounts list, before you archive it. |
| Empty state | You have no archived discounts. |
Customer selection dialog
| Setting | What it does |
|---|---|
| When it opens | On the Clover device, when the first item is added to the order, and only if Assign customers in the Register app is on. It opens once per order. |
| Search | Type part of a name to narrow the list. Each card shows the first and last name only. |
| Tap a customer | Attaches that customer to the order at once and closes the dialog. The order note is replaced with the customer's name. |
| CANCEL | Closes the dialog with no customer. It does not open again for that order — attach the customer in the Register instead. |
Screenshots taken from the running app on a Clover device. The apps’ interface language is English. Click a screenshot to enlarge.
Everyday use
What the cashier does after the app is configured.
- Ring up the first item; if the dialog is on, pick the customer straight away — it asks once per order.
- The discount is applied as soon as the customer is attached — check the order lines.
- For a walk-in customer, tap CANCEL; no discount is applied.
- If the wrong customer was chosen, remove the customer from the order first — the discount comes off — then attach the right one. Swapping one customer straight for another leaves the first customer's discount on the order. Removal matches by name, so a discount line called the same as a rule comes off too — do not name manual Clover discounts after a rule.
- The app writes the customer's name into the order note, and clears the note when the order has no customer. Do not use order notes for anything else on these tickets.
Troubleshooting
Symptom on the left, what to do on the right.
| Symptom | What to do |
|---|---|
| The discount never applies. | Check the status line on the card first: Disabled, Ended or No days selected explains it. Otherwise no customer is attached to the order, the customer is not in the Selected customers list, or the sale is inside the rule's dates but outside its From – To hours. |
| Staff keep forgetting to pick the customer. | Turn on Assign customers in the Register app so the dialog opens by itself on the first item. It asks once per order, so a cashier who taps CANCEL has to attach the customer in the Register. |
| A cashier changed a discount. | Set Who can edit discounts? to Managers & Admins or Admins only. |
| The customer list looks incomplete. | Customers come from the Clover Customers app — add them there, then reopen the picker. |
| The customer was swapped and the discount did not change. | Remove the customer from the order — the discount comes off — then attach the right one. Adding another item also forces a recalculation. |
| Archives or Settings will not open. | Who can edit discounts? gates them too. Sign in with a role that setting allows. |
| The app's dialog never appears on the payment screen; Clover shows "Customer is choosing payment method". | Open the Clover Setup app → Payments and uncheck Automatically take payment on Connected Device, so payment is taken on the primary device. |
| Settings cannot be opened or changed. | Sign in with an employee whose Clover role is Manager or Admin. Some apps also have their own Restrict access switch that locks the configuration. |
| The app works erratically, or stops reacting after the device has been idle. | Turn off Battery Saver in the device's Android settings and keep the device online. |
| A change made on one device is not visible on another. | Settings sync through the cloud; give it a minute and make sure both devices have a network connection. |