

How it works
A list of short texts
Each wish has a title for you and the text that prints.
One is picked at random
With a good number of wishes in the list, regulars rarely see the same line twice.
Each device prints from its own copy
The list is kept on the PayPlaxe server. A Clover device copies it when you open Wishes there and prints from that copy. After editing on the web or on another device, open Wishes on the device that prints.
It works out of the box
The first open creates a starter set of wishes. Turn printing on and it works.
You can start over
One action restores the original wishes; on the Clover device it deletes the ones you wrote without asking first.
What it does
Random selection
Every receipt gets a wish picked at random from the list on that Clover device.
Ready-made set
The first time you open the app it creates a starter set of wishes. This needs an internet connection.
Your own texts
Each wish has a title for you and the text that prints.
One switch
Print random wishes on receipt turns the whole thing on or off.
Reset to defaults
Restores the original wishes. On the Clover device this deletes every wish you wrote at once, with no confirmation and no undo.
Web version
wishes.payplaxe.com opens the same wish list in a browser, titled Wishes. It is the same app you already have on Clover — the setup side of it, with nothing extra to buy. Sign in with Login via Clover. Writing and deleting wishes work there; printing and the Enable the app switch stay on the Clover POS.
Price & installation
How to install
- Open the Clover App Market — on the device, or at clover.com/appmarket in your web dashboard.
- Find the app by name, or open its direct link from the button above.
- Tap Connect / Install and accept the permissions the app requests.
- The 30-day free trial starts automatically. The subscription then appears on your monthly Clover invoice.
- Open the app on the Clover device and sign in with a Manager or Admin employee account to configure it.
- To cancel later, uninstall the app from the App Market — the steps are right below.
How to cancel the subscription
Cancelling means uninstalling the app — there is no separate billing screen.
- Open the App Market — on the Clover device, or in the web dashboard.
- Open My Apps. Every app you pay for is listed there with its monthly fee.
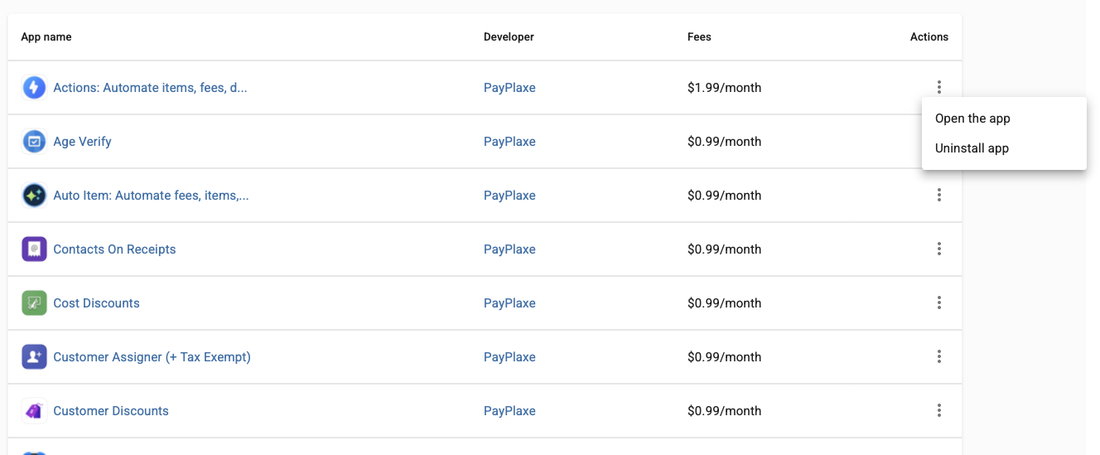
- Tap the ⋮ button on the app's row and choose Uninstall app.
- The app's own page works too: ⋮ next to the green Open the app button → Uninstall app.
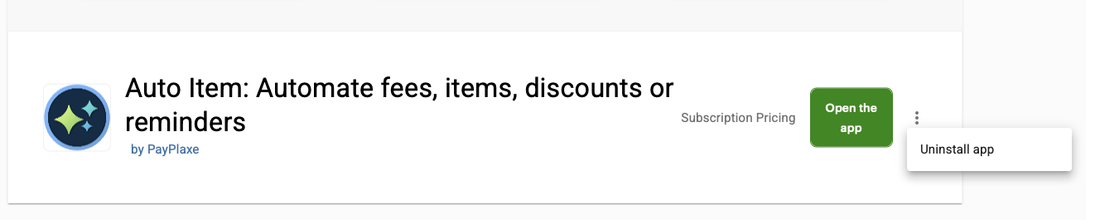
- Confirm. The subscription stops there and then — the app is off your next Clover invoice.
Install and cancel any time from the Clover App Market.
First setup
Do this once, in this order. It takes a few minutes and the app is then ready for the shift.
- Open Wishes; the first open fills the list with ready-made wishes and needs an internet connection.
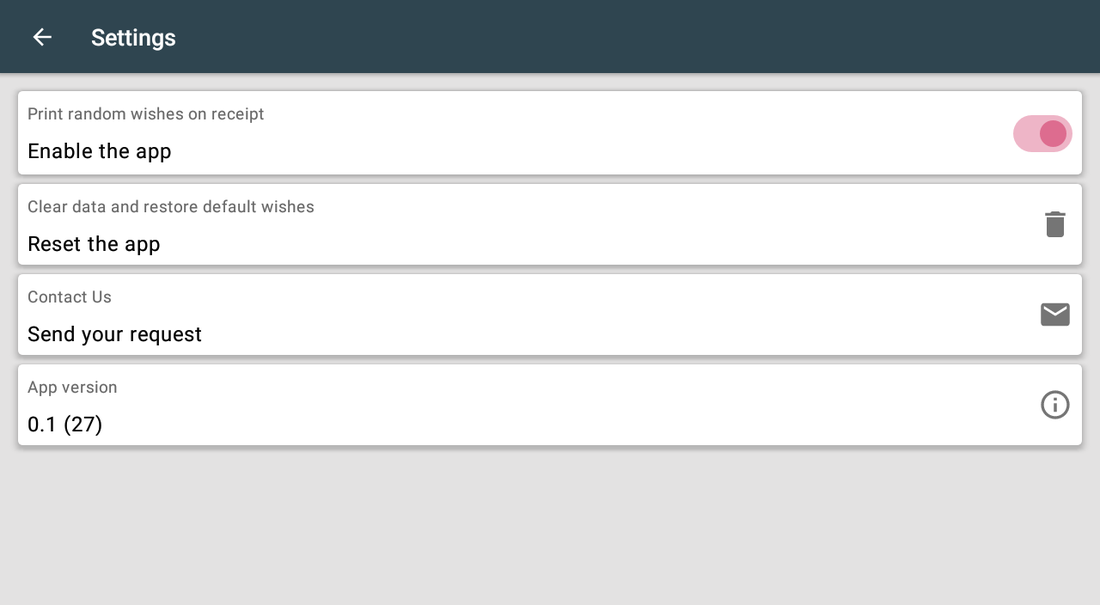
- Open Settings and turn Enable the app on.
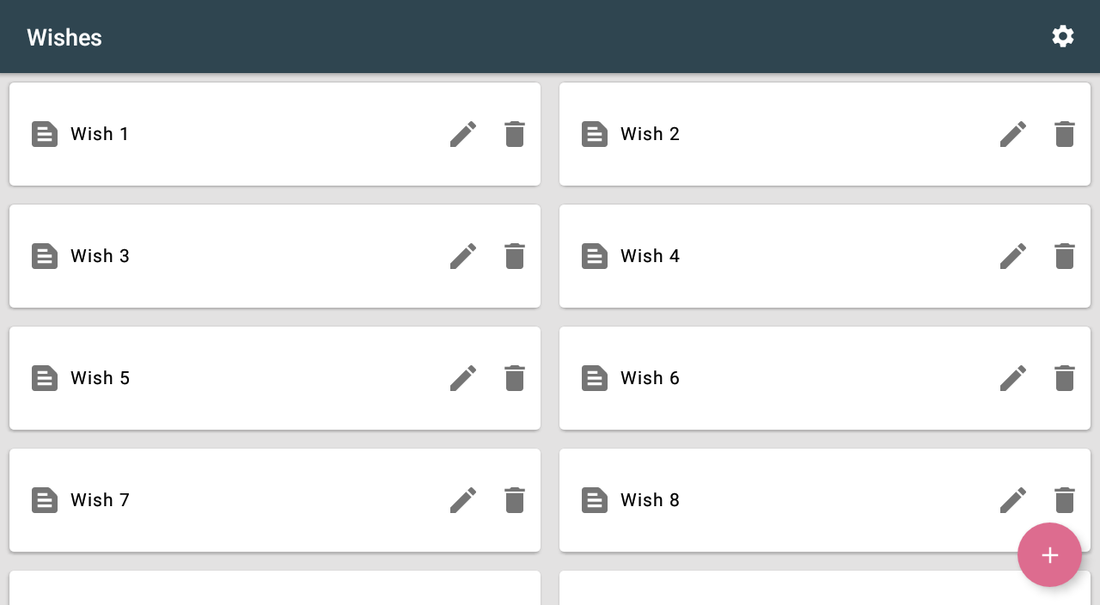
- Delete the wishes that do not fit your tone with the bin icon.
- Tap + to add your own: type a title for you, tap Wish Text, write the line in the full-screen editor and press SAVE in the top bar, then SAVE on the wish.
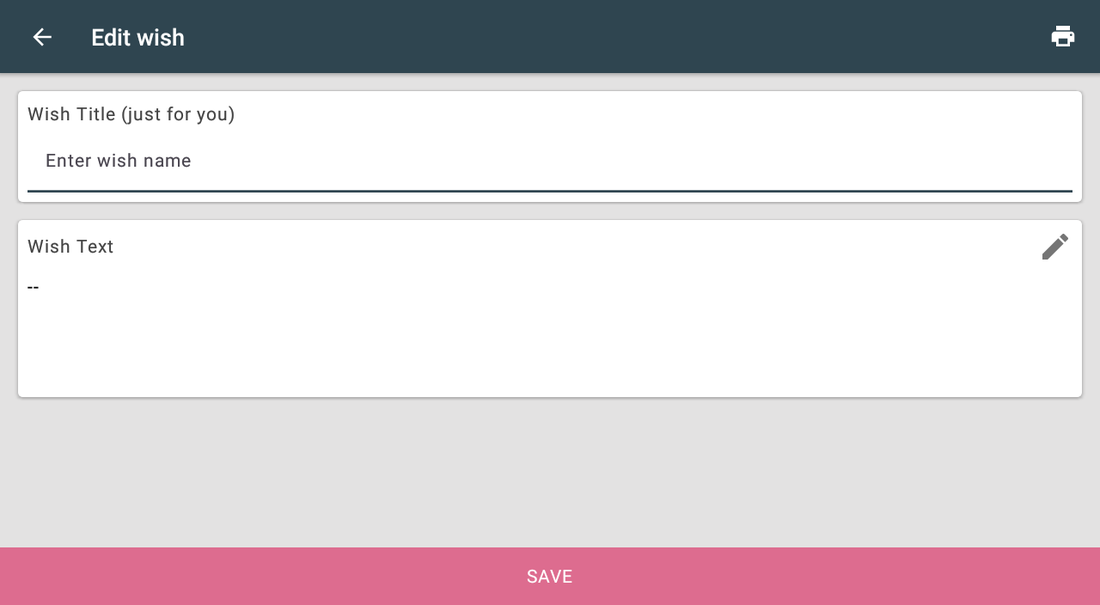
- Tap the printer icon in the top bar of the wish editor: the wish prints at once, with no sale.
Setup scenarios
Each scenario is a complete configuration — follow the steps in order.
1Turn it on with the built-in wishes
The fastest possible start — no writing required.
- Install the app and open it; the first open fills the list with a ready-made set, so keep the device online.
- Open Settings and turn Enable the app on.
- Sell something and check the printed receipt.
- Delete any wish that does not fit your tone with the bin icon on its row.
2Write wishes in your own voice
A bakery, a tattoo studio and a car workshop do not sound the same.
- Tap + to add a wish.
- In Wish Title (just for you) write a short label — it is not printed.
- Tap Wish Text: a full-screen editor opens. Write the line the customer will read — 355 characters at most — and press SAVE in the top bar.
- Press SAVE at the bottom of the wish, then repeat until you have enough variety — ten or more keeps it fresh.
- Tap the printer icon in the top bar of the wish editor: it prints the text straight away, with no sale, so you can check the line length on your paper width.
3Seasonal wishes
Holiday messages for a few weeks, then back to normal.
- Add the seasonal wishes to the list before the season starts.
- Delete or edit them when it is over.
- If the list becomes a mess, use Reset the app to restore the default set. On the Clover device it runs at once, without asking: every wish you wrote is deleted and cannot be brought back.
- For date-driven messages that must start and stop by themselves, use Text on Receipts instead.
Reference
Screens and settings
Every screen of the app and what each setting does. (3)
Screens and settings
Every screen of the app and what each setting does. (3)
Wishes list
| Setting | What it does |
|---|---|
| Wish row | The title you gave the wish. |
| Pencil / bin | Edit or delete the wish. Deleting asks for confirmation first. |
| + button | Adds a new wish. |
| Gear | Opens Settings. |
Wish editor
| Setting | What it does |
|---|---|
| Wish Title (just for you) | Internal label, never printed. |
| Wish Text | A card, not a text field. Tapping it opens the full-screen Edit text screen. Maximum 355 characters; typing stops there. |
| SAVE (top bar) | On the Edit text screen: keeps the line and returns to the wish. The wish itself is not saved yet. |
| Printer icon in the top bar of the wish. Prints the wish text at once, with no sale. | |
| SAVE | Stores the wish and returns to the list. |
Settings
| Setting | What it does |
|---|---|
| Print random wishes on receipt | Master switch for printing. |
| Reset the app | Restores the default wishes. On the Clover device it starts at once, with no confirmation: every wish you wrote is deleted and cannot be recovered. |
| Contact us | Support request from the app. |
| App version | The installed version. |
Screenshots taken from the running app on a Clover device. The apps’ interface language is English. Click a screenshot to enlarge.
Everyday use
What the cashier does after the app is configured.
- Nothing to do — a wish is added to each receipt automatically.
- After editing the list on the web or on another Clover device, open Wishes on the device that prints; until then it keeps printing its old list.
- Swap seasonal wishes in and out as the year goes on.
Troubleshooting
Symptom on the left, what to do on the right.
| Symptom | What to do |
|---|---|
| Nothing prints. | Print random wishes on receipt is off, or the list is empty. The first open needs an internet connection to create the wishes. |
| The same wish keeps appearing. | There are too few wishes in the list — add more. |
| A wish I added or deleted is still not on the receipts. | That Clover device prints from its own copy of the list. Open Wishes on it; the copy is refreshed and the change takes effect. |
| The line is cut on the paper. | Shorten the wish text; receipt paper is narrow. |
| The app's dialog never appears on the payment screen; Clover shows "Customer is choosing payment method". | Open the Clover Setup app → Payments and uncheck Automatically take payment on Connected Device, so payment is taken on the primary device. |
| Settings cannot be opened or changed. | Sign in with an employee whose Clover role is Manager or Admin. Some apps also have their own Restrict access switch that locks the configuration. |
| The app works erratically, or stops reacting after the device has been idle. | Turn off Battery Saver in the device's Android settings and keep the device online. |
| A change made on one device is not visible on another. | Settings sync through the cloud; give it a minute and make sure both devices have a network connection. |